Table of Contents
| Table of Contents |
|---|
...
Make sure that the projects and issues are already migrated Cloud.
Server/Data Center to Cloud
Use Atlassian-recommended methods, which preserve Jira issue keys of the Server/DC issues in the target Cloud. See more details on the following page: What is Jira Cloud Migration Assistant? | Atlassian Support.
Cloud to Cloud
Use Atlassian-recommended methods, which preserve Jira issue keys of the original issues in the target Cloud. See more details on the following page: Merge multiple Jira Cloud sites | Jira | Atlassian Documentation.
From the available methods, Use a CSV file to import issues will not be suitable for further restoring the objects in Jira issue fields, as in this case original issue keys are not preserved!
The user (email) indicated in the current connection must be added to the project(s) and have valid permission to view and edit.
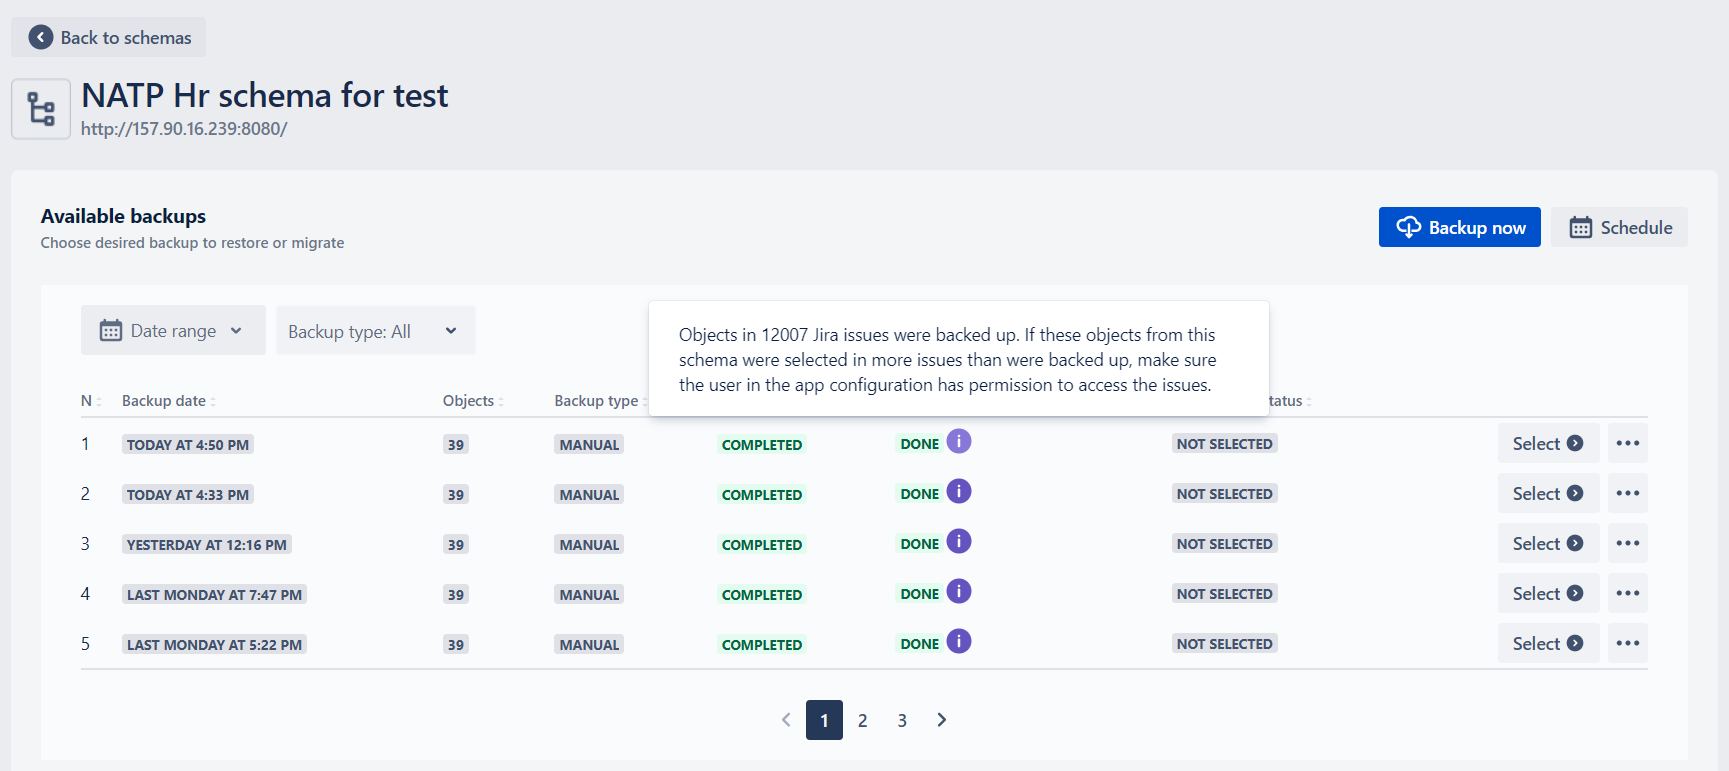
After backup is completed, objects in issue fields are backed up in the background. The backup status of the objects in issue fields can be checked under “Objects in issues status“ column of the “Available backups“ grid. Only after the status is COMPLETED, it is possible to start restoring objects in Issue fields. While the status is IN PROGRESS, “Restore objects in issues” will be disabled (see Restore Process). By clicking the (i) info button, you will see the number of the issues in which the objects from this schema are selected.
...
| Info |
|---|
The “Restore objects in issues“ will be disabled, until “Objects in issues status” is IN PROGRESS (see Prerequisites) or if another process of objects restore in fields is ongoing. |
After clicking the button, you will see the popup with the prerequisites reminder, Start Process button, and link to the current instructions:
...
1. Validate fields to restore
After clicking Start process button, you will see the list of the Jira fields of the original Server/DC or Cloud instance, where the Asset objects from the original backup are presented:
...
From here you can select the fields, that you want to restore and click the Continue button. The selected fields will be checked and the validation results will be shown in the next screen.
...
If there are blocking issues with the fields, the Continue button will be disabled. After sorting the issues out and Restarting the check, if there are no issues that might prevent the restore, click the enabled Continue button to proceed to the Configuration helper screen.
...
| Note |
|---|
There are crucial configuration considerations for successful restore:
|
After configuring the fields come back to the Configuration helper and click the Refresh all button. If the fields are configured properly, you will see the corresponding result:
...
After typing the desired JQL, click the Validate query button to see the result:
...
| Note |
|---|
If the JQL scoping is on and the query is not validated, the Start restore button will be disabled, until the JQL is validated. |
...
To simplify the configuration of the fields on the Cloud instance, you can review the Screens and Request Types, where the fields in the backup are associated with. To do so, click the “View Screens and Tabs” button above JQL scoping:
...
To export the list, click the “Export“ button. The downloaded file (in .xlsx format) will contain the data organized in the same columns as on the interface.
...
After configuring all the fields, click the “Start Restore“ button. When the restore starts, you will see the following screen:
...
| Info |
|---|
The “Restore objects in issues“ will be disabled, until “Objects in issues status” is IN PROGRESS (see Prerequisites) or if another process of objects restore in fields is ongoing. |
After clicking the button, you will see the popup with the prerequisites reminder, Start Process button, and link to the current instructions:
...
1. Choose the fields to migrate
After clicking Start process button, you will see the list of the Jira fields of the original Server/DC or Cloud instance, where the Asset objects from the original backup are presented:
...
From here you can select the fields, that you want to restore and click the Start Restore button. the restore will be started and the selected fields will be updated.
...
When the objects in issues is already restored at least once from the backup, you can repeat the restore again with the last configuration, without configuring the fields from scratch. To do so, click “Objects in issues“ button again, in the “Objects in issues“ box:
...
On the popup, you will see “Repeat Restore“ button (this button is not visible when the objects in issues restore is not yet run from the backup):
...
Clicking the “Repeat restore“ button will display the configuration of the last fields restore, including used JQL and the updated fields:
...
Clicking the “Restore” button will start the fields update and you can check the progress in the Restores, under the “Objects in issues“ box.
...
